Portal Callout Scheduling: Difference between revisions
No edit summary |
No edit summary |
||
| Line 34: | Line 34: | ||
[[File:Group-edit.PNG]] | [[File:Group-edit.PNG]] | ||
Click in the "Members" box and search by name to find a contact, then select to add to the group. Members can be removed from the group by clicking "x" next to the name. | |||
Be sure to select "Save" when finished. | |||
==Adding Contacts or Groups to a Unit== | |||
Once the relevant contacts and/or groups have been created they can now be assigned to units. | |||
To edit a unit callout schedule select the unit from the home page to go to the dashboard. Then select the "Callout Scheduling" dropdown followed by "Calendar". | |||
[[File:Unit-dropdown-sched.PNG]] | |||
This will go to the calendar page for a unit. To add a person or group to a unit, use the search box on the right to find a person or group, then drag it over onto the calendar. | |||
[[File:Group-search.png]] | |||
''Finding a group'' | |||
[[File:Group-drag.png]] | |||
''Click and drag onto calendar'' | |||
After dragging a contact or group onto the calendar, it should appear in the "Always on contacts" list on the right side. | |||
[[File:Group-on-unit.PNG]] | |||
===Viewing Summary=== | |||
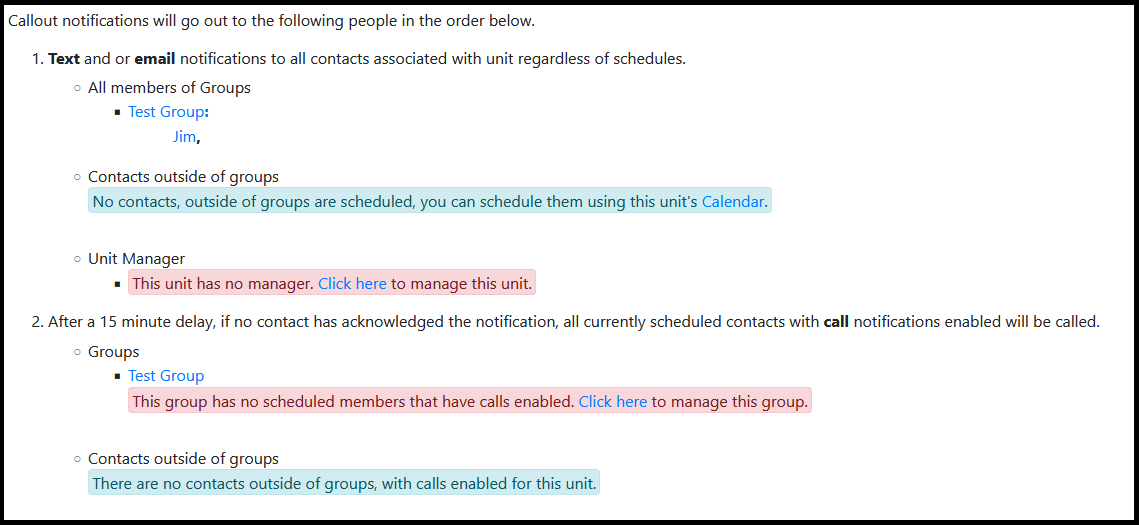
A summary of who will be contacted is shown under a unit "Callout Scheduling" -> "Overview" | |||
[[File:Callout-summary.PNG]] | |||
Revision as of 16:24, 17 August 2022
The web portal at https://data.emittechnologies.com/ can be used to set up callout functionality for active units.
General Concepts
Contact
A contact represents a person who can be contacted for a callout. The person can get text messages, phone calls, emails, or some combination of these. First, a contact for a person has to be created.
Creating a new contact
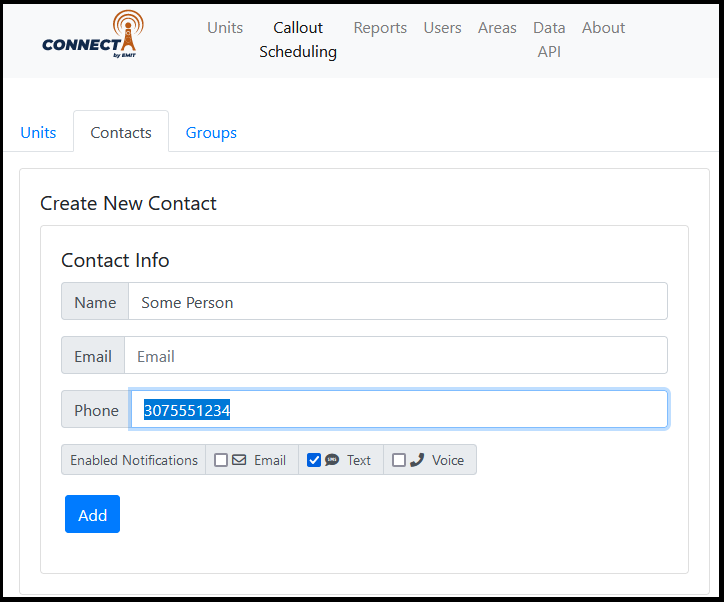
On the site, select the "Callout Scheduling" section at the top. Next, select the "Contacts" tab.
At the top of the tab enter the name and email and/or phone for a person. Select the checkboxes for the type of messages the person should get- email, text, and/or voice. Then, select "Add". The person will then go into the list on this page.
Tip: If the contact is for a customer, add the company to the name as well to help with searching later.
Editing a contact
In the lower part of the Contacts page is a list of all contacts. They can be filtered by
Group
A group is a group of people that will be contacted together. It can be used to group contacts for an area, part of an area, customer contacts in the area, etc. Using groups makes setting up and changing callouts easier because once the group is on some units if there is a change in the contact list it can be edited once in the group rather than on every unit. A contact can be in multiple groups.
Creating a new group
To create a new group, click on "Callout Scheduling" at the top of the page then "Groups" just below that. At the top of the Groups tab enter a new group name in the "Name" box and then click "Create".
Adding people to a group
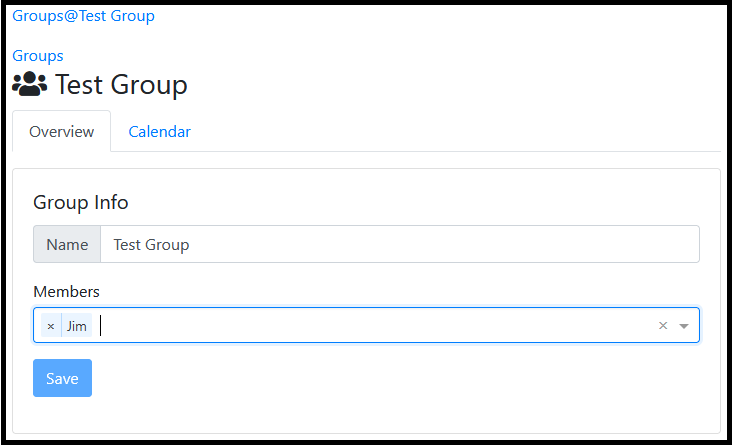
On the lower part of the Groups page is a list of existing groups. Select a group name to go to the Group edit page.
Click in the "Members" box and search by name to find a contact, then select to add to the group. Members can be removed from the group by clicking "x" next to the name.
Be sure to select "Save" when finished.
Adding Contacts or Groups to a Unit
Once the relevant contacts and/or groups have been created they can now be assigned to units.
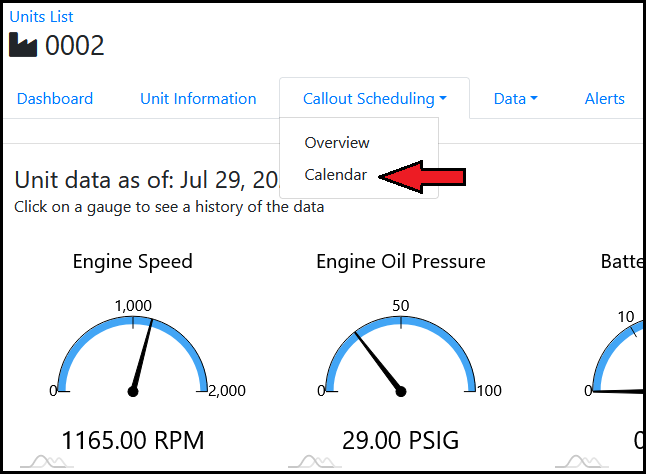
To edit a unit callout schedule select the unit from the home page to go to the dashboard. Then select the "Callout Scheduling" dropdown followed by "Calendar".
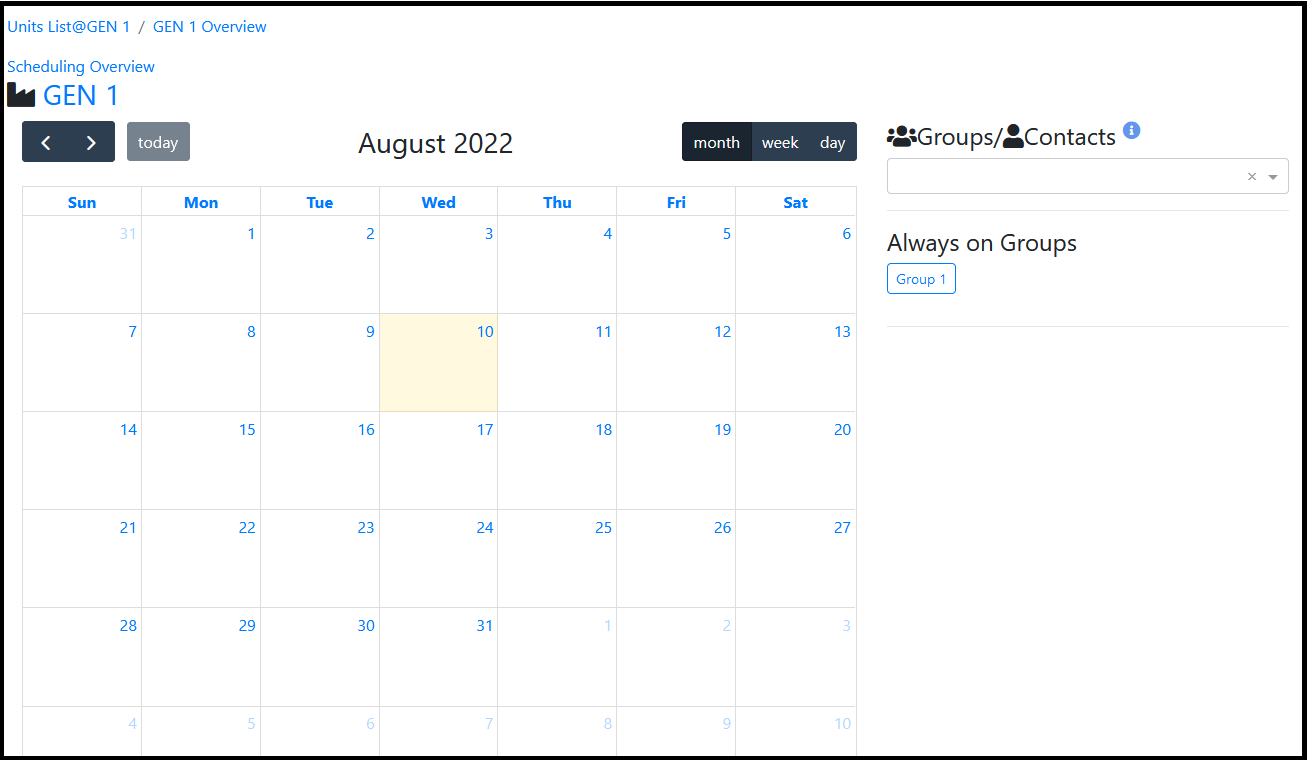
This will go to the calendar page for a unit. To add a person or group to a unit, use the search box on the right to find a person or group, then drag it over onto the calendar.
After dragging a contact or group onto the calendar, it should appear in the "Always on contacts" list on the right side.
Viewing Summary
A summary of who will be contacted is shown under a unit "Callout Scheduling" -> "Overview"
